Fuel Tank
Fuel Tank and Front Deck
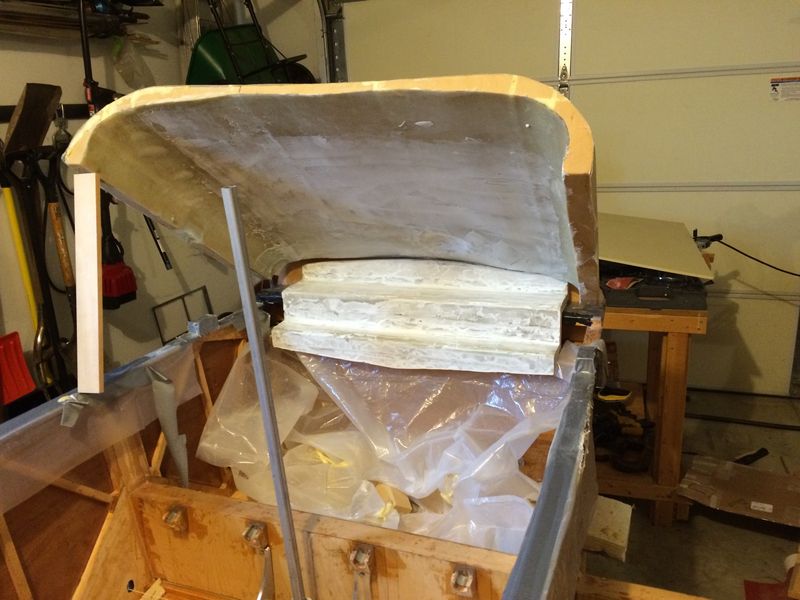
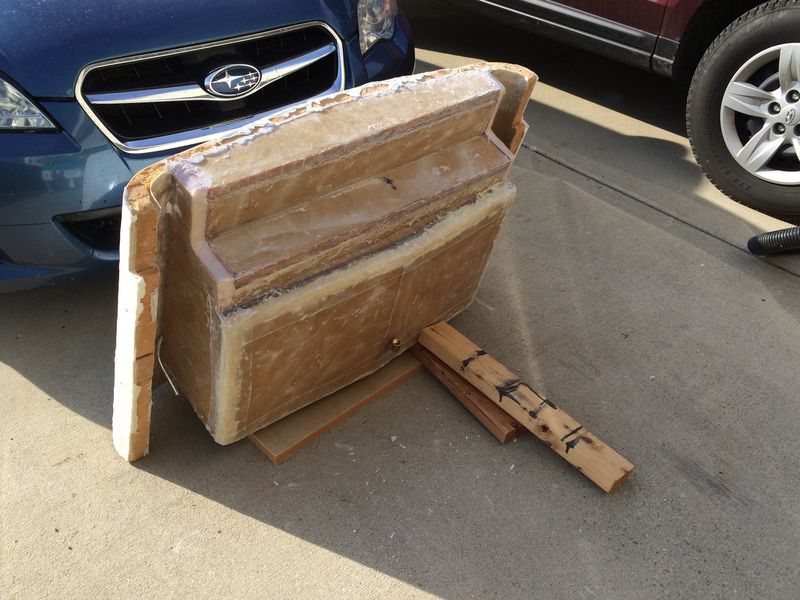
Below you see the beginnings of the fuel tank, which will be an integral part of the front deck (which is tilted up and forward in the photo). It looks like crap right now, but I'm very happy with how it's coming into shape and am confident in my ability to make the fiberglass components look good in the end. If you look closely you might see the indentation in the front deck, up into which the fuel vent tube will fit.
I used vinyl-ester epoxy for the fuel tank walls and the underside of the front deck. The tank walls are fiberglass and foam sandwiches. The inside walls will have three layers of glass, and the outside two. I'll also paint on a final layer of vinyl ester pure epoxy over everything before closing the tank up. When you put it on thickly, it comes out like a layer of glass. Vinyl ester is trickier to work with than aeropoxy, and very stinky, but it's designed specifically to be fuel resistant. I used up all of my one gallon kit, and will wait till spring 2015 to buy another gallon since it supposedly has a shelf-life of a few months, and I will only use this stuff when I can be outside. Luckily the neighbors haven't complained. Vinyl ester stinks like burning plastic when you add the dangerous and very reactive MEKP catalyst.
All in all, I don't think I'm saving any money by making my own composite fuel tank, and I also don't think it'll be any lighter than an aluminum tank, either. When I build my next KR, I'll seriously consider buying ready-made plastic tanks from a racing car supply site.
The choice to have only one gravity-feed fuel tank, situated in the nose as per plans, was all about simplicity and lightness. By a conservative calculation, I think I'll have at least 15 (possibly up to 18) gallons of usable fuel with this setup.
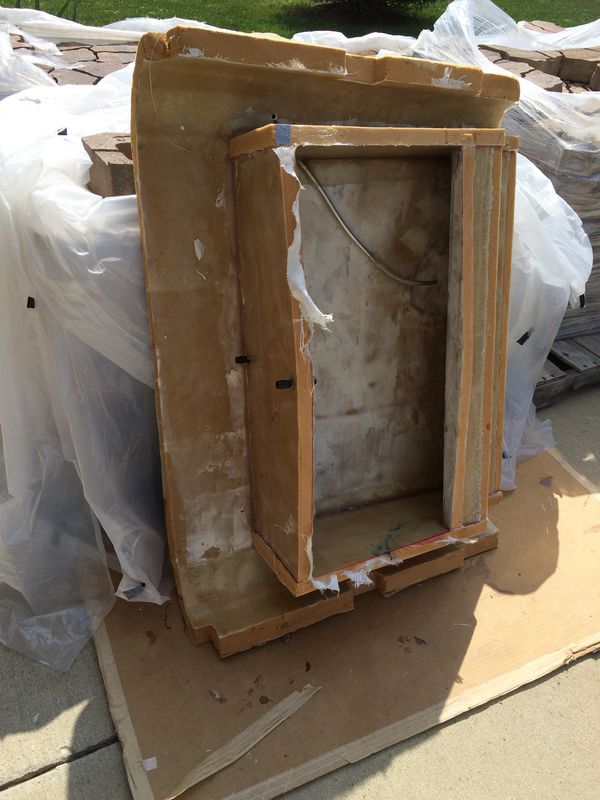
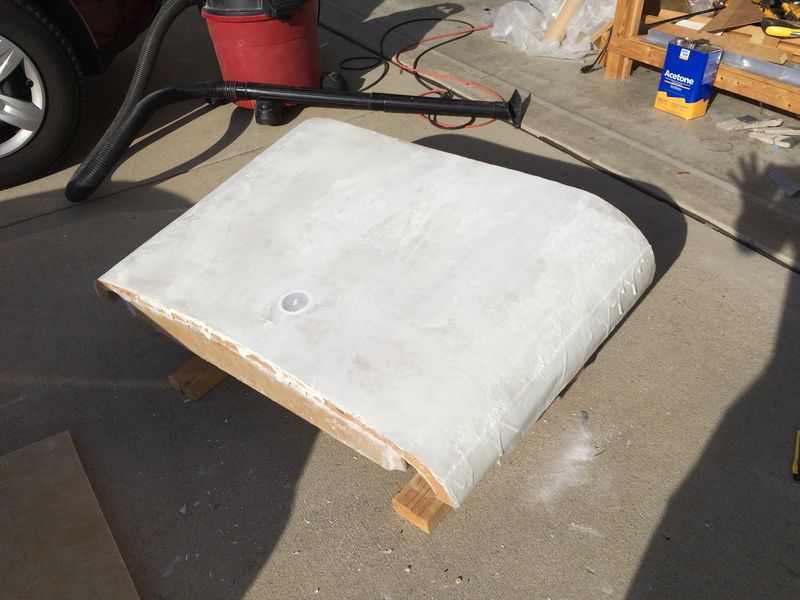
Above: the fuel tank at a very rough stage of development. Each panel has 3 layers of glass on the interior and 2 layers on the exterior. I followed Tony Bingelis' "Sportplane Construction Techniques" when putting all this together. The panels are all floxed together at their edges. All corners and joints on the inside of the tank are covered by additional strips of fiberglass tape. Before applying the glass tape, I spread and then pressed a bead of wettish flox into all joints to insure the seal. You can see the aluminum air vent tube glassed in place. At a later stage I installed a baffle in the middle of the tank to keep fuel from rushing from side to side during flight. The paler whitish shades you see on many areas of the fiberglass (aside from what is obviously micro) are NOT voids indicating a lack of epoxy. Rather, the slurry I used to wet the foam out before glassing was pretty thick and showed white in many places through the glass after glassing it. I was liberal with the vinyl ester while making the tank.
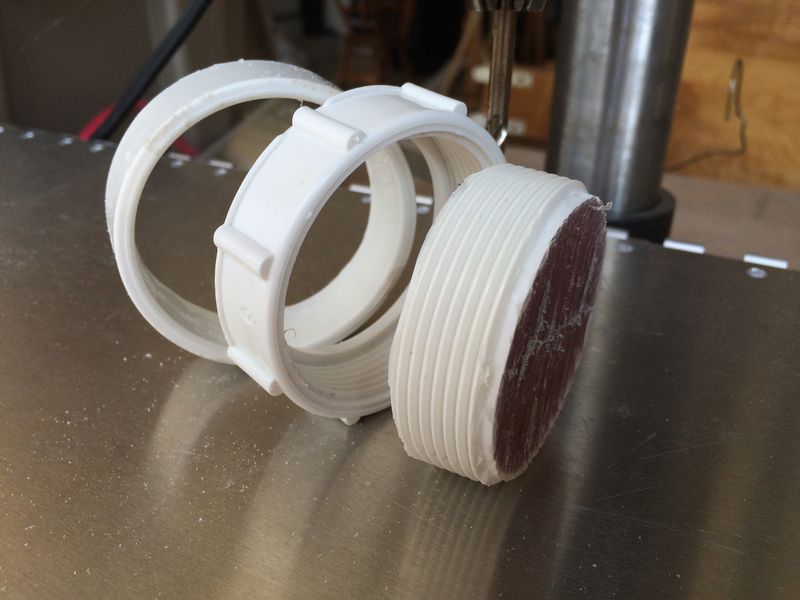
Above: Even though I was a little skeptical about it, I decided to try the manual's suggestion of making my own flush-fit fuel tank cap. Unlike the manual's version, I did not use a milk bottle lid. This PVC fitting was perfect for the job. The piece to the left was originally part of the piece on the right. I was going to use it as a filler neck which was going to protrude slightly into the tank. But it proved unnecessary. The cap on the right was filled with vinyl ester flox, which hardened into a plug. The female piece in the middle was nestled into the top side of the front deck with vinyl ester flox. I left the entire component protruding up from the top of the deck about 1/8 inch while installing it. After applying micro on the top of the front deck, I sanded the fuel cap down flush with the top of the front deck. Then I cut a slot in the top of the cap (directly into the vinyl ester plug), which allows me to open and close the cap with a quarter. It turned out really well.
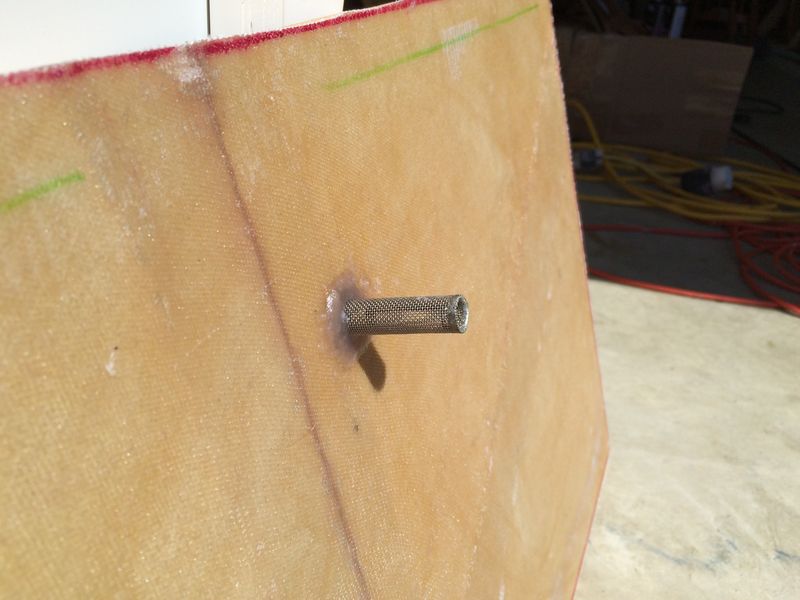
Above: this is the inside of the bottom tank panel just before I closed the tank. The fuel pick-up port sits forward and is offset to the left side a few inches from the back of the tank. The entire bottom panel of the tank tilts down from front to back. There is also a channel running down the center of the tank from front to back. Thus the fuel port is separated from a kind of natural "sump" area at the rear of the tank that I can clean out easily. I figured my EAA technical counselor will appreciate a picture of the finger strainer over the fuel-pick up port.
Still ugly and unfinished--but closed! And extremely strong. After cleaning this up and smoothing things out, I will work on other things and allow it to cure for several weeks before running leak tests. If there's ever a "Heaviest Fuel Tank" award at AirVenture, I might be in the running. Actually, it's probably comparable to a metal tank in weight. I will now close the remaining exposed foam edges with flox.
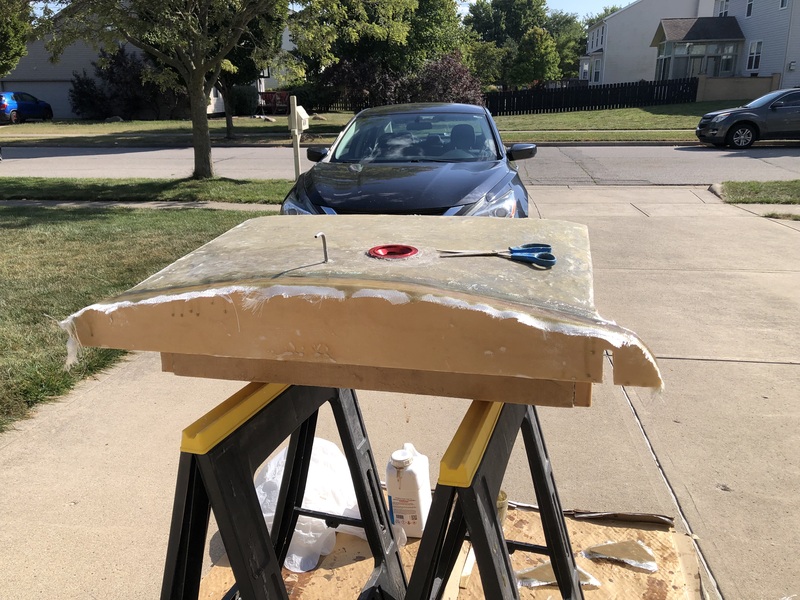
Above, I covered the top of the tank with about 1/8" layer of dry micro and started to sand it down--just wanted to get the fuel tank cap flush with the top of the deck. As you can see--it's really flush, and most importantly it opens and closes.
Above (September 2023): I was not satisfied with the original gas tank. As painful as it was to suck it up and start over, the above tank is fit for a Rotax 912 ULS (with a return line) and does not leak, praise God. The key difference between this and the original is that I built this one from the bottom up.
I used 1/2" thick "Last-a-foam" for most of it, with 2-3 layers of glass and vinylester resin. For the tank bottom, I used a 2" thick slab of foam sanded out to make a low trough for the gas pickup fitting. Two barbed fittings are stuck in the back for a simple sight fuel gauge.
The tank and front deck are one unit, secured to the front fuselage with 4 bolts. The whole assembly is removeable.
As you can see from the picture, I am opting for simplicity with a topside tank vent. The fuel cap seems nice and is reasonably priced from Aircraft Spruce. The tank will hold 12-13 gallons, which should give me plenty of range for my purposes.