Wings 3
Wings page 3
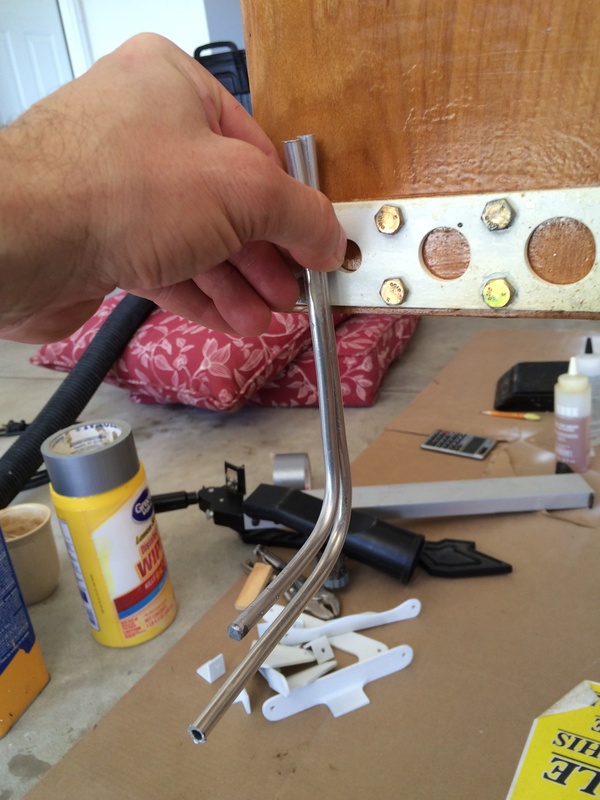
I'm getting ready to make the stub wings. Below is an example of some things you have to figure out before you start closing the wings up with foam and glass. I made the pitot and static tubes out of 1/4 aluminum tubing. The longer bottom tube is the pitot, which transmits ram air pressure to your instruments, whereas the upper (plugged) tube has tiny holes in its side which allow the instruments to measure static air pressure. Together, these tubes are what give you your speed and altitude readings. I'm going to mount them as far out as possible on the left wing stub. I'm putting my fuel tank vent tube down through the bottom of the right wing, nearer to the fuselage.
Also, before glassing the wings, I had to fabricate the aileron control cable system complete with shackles, turnbuckles and "nico-press" swages before starting the wings (see "controls 2" page).
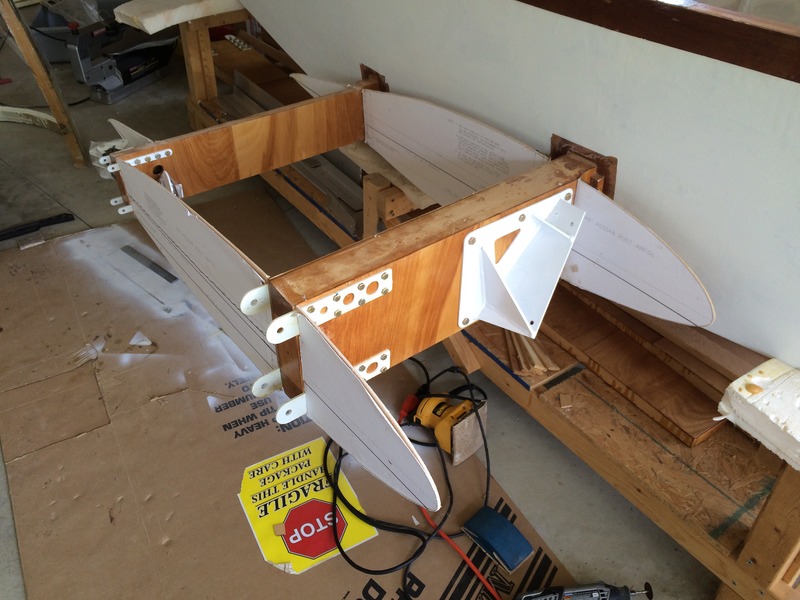
Above: After getting the fuselage perfectly leveled, I mounted the airfoil profiles on the spars. I used a laser level to match the two templates perfectly and establish the 1 degree angle of incidence, which Mark Langford has conveniently marked on the templates. I then sanded them down perfectly to the outline of the airfoils (the process is not yet finished in this photo). Notice also that I've got my landing gear brackets mounted. The aileron system pulleys and bell cranks are protected by plastic bags.
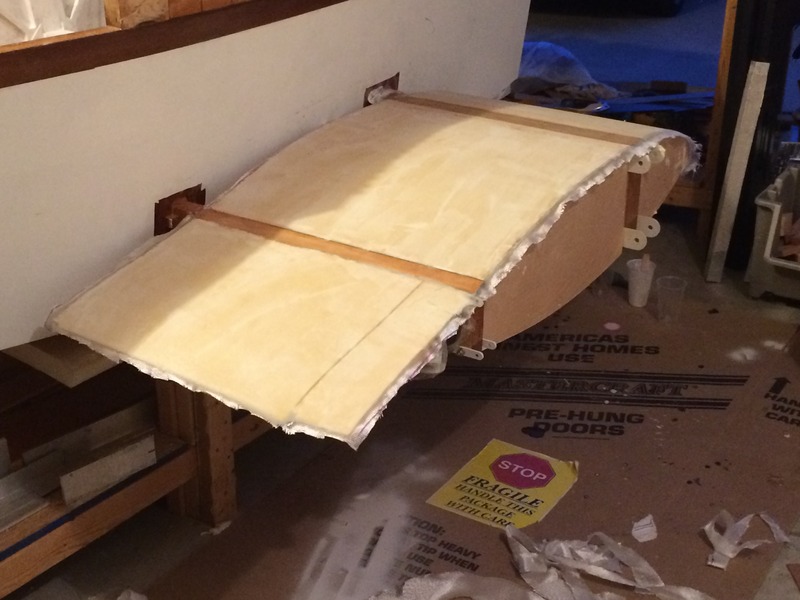
Following the manual, I used one layer of KR cloth from the front spar to the trailing edge, and two layers from the front spar forward, wrapping both layers down under the leading edge, past the chord line about three inches. The cloth was cut and laid with its weave "on the bias," at a 45 degree angle to the longitudinal axis of the fuselage, to provide maximum torsional strength. I covered the wetted glass with one piece of peel ply, which helps soak up excess epoxy and create a nice smooth finish.
Compared with everything else I've made on this plane, the wings seem very large. The 5048 airfoil profile is chunky.
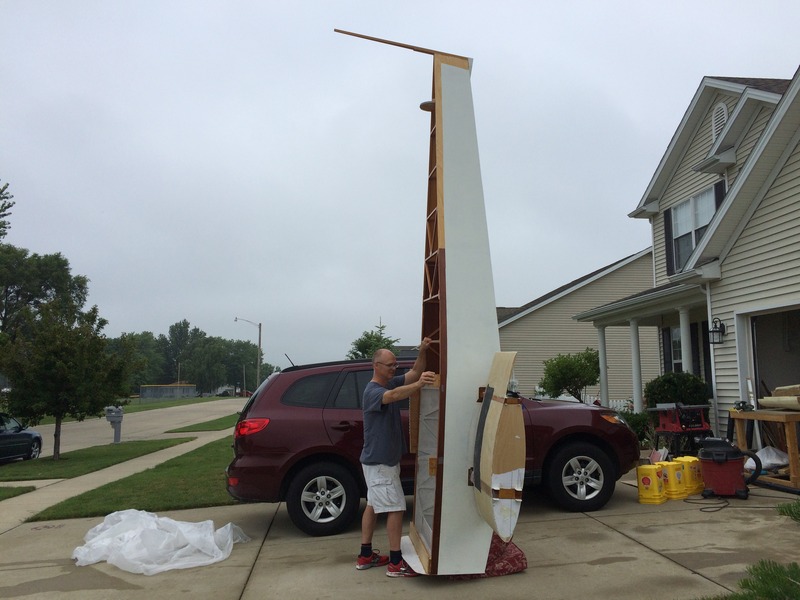
Above: Now that I've glassed the tops of both sides of the wing stubs, it's time to flip the plane over for the first time so I can get to the bottom side. This should be one of three--maybe four--flips total. Turning it over was an awkward operation and I'm going to build a support apparatus for next time.
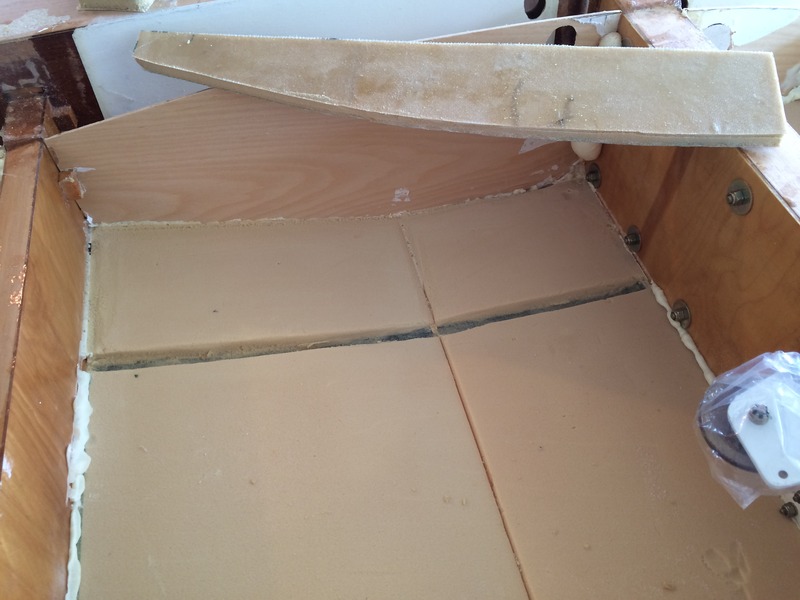
I decided early on not glass the insides of my wings, opting to go with the plans in this regard. However, my big fat wife definitely needs more than one layer of fiberglass underneath her size 12 men's shoe when she steps on the wing to get into the plane. So I built a reinforced "wing-walk" area on the pilot side of the plane. I started by laying down a strip of carbon fiber on top of the stub wing, which is barely visible in the picture above where I'm flipping the plane over. In the picture directly above, the plane is upside-down. I gently dug a trench into the foam down to the cured fiberglass of the top of the pilot-side wing, about 7 inches out from the inner airfoil template. Then I cut a strip of foam/fiberglass sandwich to the contour of the airfoil (the strip is resting on top of the picture), long enough to fit exactly between the spars.
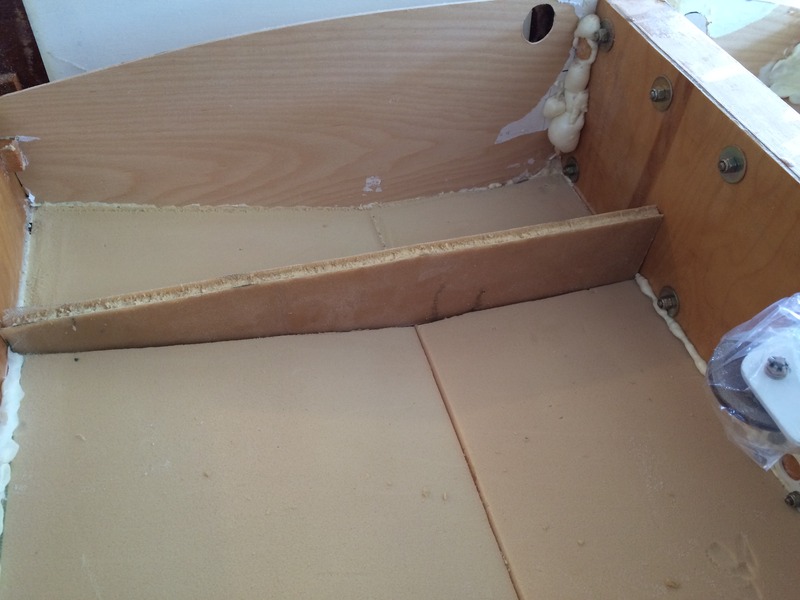
Above, I put a bed of flox into the trench and nestled the foam/fiberglass strip into it, creating a kind of half rib. So, the buried part is following the top of the wing contour, actually touching the cured glass. I then floxed all this in thoroughly and as you can see I also dug about 1/4 inch into the top edge of the strip so I could seal the edge with flox. Crucially, the strip is floxed to the front and rear spars; this gives it whatever weight-bearing strength it will have.
The big bubble of excess foam you see in the corner is "Great Stuff" spray foam which I used successfully to bind that section of the template back to the spar. The template came loose when I began drilling holes through it for future control cable passage. I've found that "Great Stuff" is an excellent adhesive for foam, but as with micro, you never want it to stick above the surface level of any foam sanding operation. It will inevitably create a "hump" as it sands completely differently than the real stuff. That being said, I've started using it to bind foam into the fuselage and wing structures. If you make a mistake and spray too much of it (as I did in the above picture), you can easily cut all excess off with a box cutter blade. I use acetone to rinse the Great Stuff sprayer tube and can nozzle quickly after every use--otherwise you end up wasting a lot of each can.
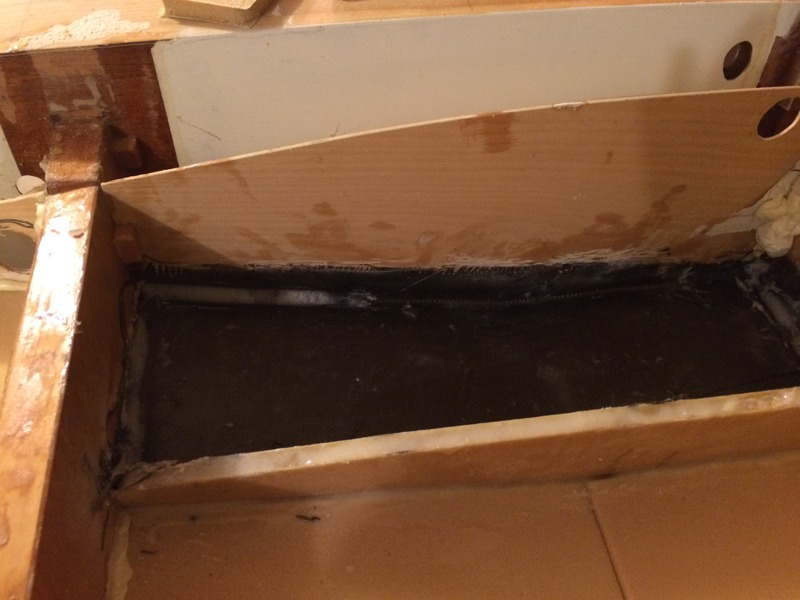
Above, I laid down a carbon fiber strip in the trough. The edges of the CF are folded up and epoxied onto the spars, airfoil template, and "half-rib," giving the strip a base of actual structural strength. The fake rib ought also to provide a good amount of support for the walk. After this cured, I pushed on it from below and it felt rock-solid. Ought to work fine!